Master the Art of Capturing Screenshots on Your Samsung Galaxy F04 SM-E045F/DS
Discover Multiple Methods, Expert Tips, and Enhanced Editing and Sharing Options
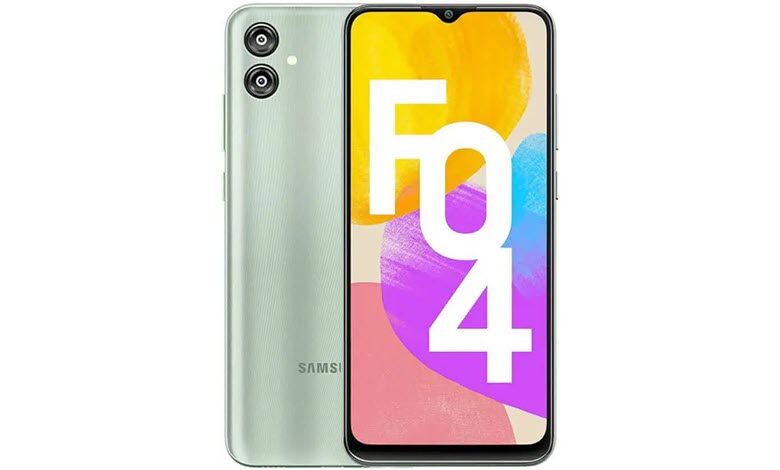
In today’s digital age, smartphones play a crucial role in our daily lives, keeping us connected, informed, and entertained. One essential feature that has emerged as a vital tool for communication and content sharing is the ability to take screenshots. Whether you want to save important information, capture a funny meme, or document an engaging conversation with friends, screenshots enable you to quickly save and share those moments.
The Samsung Galaxy F04 SM-E045F/DS, with its impressive display and powerful processor, offers a seamless experience that makes your life more enjoyable and efficient. With multiple methods available for taking screenshots, you’ll never miss a chance to capture important moments. In this guide, we’ll explore the various techniques for taking a screenshot on your Samsung Galaxy F04 SM-E045F/DS, along with expert tips, detailed editing and sharing guides, and an FAQ section to answer your questions. Let’s start mastering the world of screenshots on your Samsung Galaxy F04 SM-E045F/DS!
Table of Contents
Methods for Capturing Screenshots on Your Samsung Galaxy F04 SM-E045F/DS
In this section, we will explore various methods to take a screenshot on your Samsung Galaxy F04 SM-E045F/DS. Each technique offers a unique approach, allowing you to choose the one that best fits your needs and preferences.
Method 1: Button Combination Technique

- Navigate to the screen or app you want to capture.
- Firmly press and hold the Power button and the Volume Down button simultaneously for a couple of seconds.
- You’ll hear a shutter sound and see a brief flash, indicating that the screenshot has been taken.
- The captured screenshot will appear as a thumbnail in the notification panel, and you can access it in the Gallery app.
Method 2: Palm Swipe Gesture

- First, ensure that the Palm Swipe gesture is enabled by going to Settings > Advanced features > Motions and gestures > enable “Palm swipe to capture.”
- Open the screen or app you wish to capture.
- Place the edge of your hand (either side) on the screen and quickly swipe it across the screen to the other side.
- You’ll hear a shutter sound and see a flash, confirming that the screenshot has been taken.
- Access your captured screenshot in the Gallery app or from the notification panel.
Method 3: Smart Capture Toolbar
- Take a screenshot using either the button combination technique or the palm swipe gesture.
- Once the screenshot is captured, a toolbar with additional options will appear at the bottom of the screen.
- Use the toolbar to access various features, such as scroll capture (for taking extended screenshots), draw (for annotating the screenshot), crop (to focus on a specific area), or share (to send the screenshot directly from the screen).
Method 4: Google Assistant
- Ensure that Google Assistant is enabled on your Samsung Galaxy F04 SM-E045F/DS. You can activate it by saying “Hey Google” or by long-pressing the Home button.
- Navigate to the screen or app you want to capture.
- Say the command, “Take a screenshot,” and Google Assistant will capture the screen.
- The screenshot will be saved to your Gallery app, and you can also share it directly from the Google Assistant interface.
Method 5: Third-Party Screenshot Applications
- Visit the Google Play Store and search for third-party screenshot applications, such as Screenshot Easy or Screen Master.
- Install the app of your choice and follow the on-screen instructions to set it up.
- Use the app’s unique features and methods to capture screenshots on your Samsung Galaxy F04 SM-E045F/DS.
Expert Tips for Perfect Screenshots
- Keep your screen clean and free of smudges to capture clear screenshots.
- Ensure you have sufficient storage space on your device to save your screenshots.
- Experiment with different methods to find the one that works best for your needs and preferences.
- Utilize the editing features available on your device to enhance your screenshots before sharing them.
- Be mindful of the content you’re capturing and sharing to protect your privacy and that of others.
Editing Your Screenshots: A Comprehensive Guide
After capturing a screenshot, you can edit it using the built-in editing tools available in the Gallery app. Follow these steps to personalize and enhance your screenshot before sharing it:
- Open the Gallery app and locate your screenshot.
- Tap on the screenshot to open it, and then tap the Edit button (usually represented by a pencil icon).
- Use the various editing tools to make adjustments to your screenshot:
- Crop: Remove unwanted parts of the image or focus on a specific area.
- Rotate: Change the orientation of the screenshot.
- Filters: Apply various filters to enhance the overall look and feel of the image.
- Draw: Add freehand drawings or annotations to your screenshot.
- Text: Insert text or captions to provide context or explanations.
- Once you’re satisfied with your edits, tap the Save or Done button to save your changes.
Sharing Your Screenshots: Step-by-Step Instructions
Once you’ve captured and edited your screenshot, you can share it with friends, family, or colleagues using various methods, such as messaging apps, email, or social media platforms. Follow these steps to share a screenshot:
- Open the Gallery app and locate the screenshot you want to share.
- Tap on the screenshot to open it, and then tap the Share button (usually represented by a triangle or arrow icon).
- A list of sharing options will appear. Select your desired sharing method, such as messaging apps, email, or social media platforms.
- Add any necessary text or context, and then send or post your screenshot.
FAQs
Q: Can I take a screenshot while using third-party apps on my Samsung Galaxy F04 SM-E045F/DS? A: Yes, you can generally take screenshots while using third-party apps on your Samsung Galaxy F04 SM-E045F/DS. However, some apps may restrict the ability to take screenshots due to security or copyright reasons.
Q: Is there a limit to the number of screenshots I can store on my Samsung Galaxy F04 SM-E045F/DS? A: The number of screenshots you can store on your Samsung Galaxy F04 SM-E045F/DS depends on the available storage space on your device. As long as you have sufficient storage, there is no specific limit to the number of screenshots you can save.
Q: Can I take a screenshot of a specific area or portion of the screen? A: While the default screenshot methods capture the entire screen, you can crop the screenshot to focus on a specific area using the editing tools available in the Gallery app. Alternatively, you can use third-party screenshot applications that offer features to capture a specific area or portion of the screen.
Q: Can I take a screenshot while playing a video on my Samsung Galaxy F04 SM-E045F/DS?
A: Yes, you can take a screenshot while playing a video on your Samsung Galaxy F04 SM-E045F/DS. However, keep in mind that the screenshot will capture a still frame of the video at the exact moment you take the screenshot.
Q: How do I delete a screenshot on my Samsung Galaxy F04 SM-E045F/DS?
A: To delete a screenshot on your Samsung Galaxy F04 SM-E045F/DS, open the Gallery app, locate the screenshot you want to delete, tap and hold the screenshot to select it, and then tap the Delete button (usually represented by a trash bin icon). Confirm the deletion to remove the screenshot from your device.
Conclusion
Taking screenshots on your Samsung Galaxy F04 SM-E045F/DS is a simple and useful skill that enables you to save and share important moments, information, and conversations with ease. By exploring the various methods for capturing screenshots, as well as expert tips, editing guides, and sharing options, you can master the art of screenshots and enhance your Samsung Galaxy F04 SM-E045F/DS experience. Remember to experiment with different techniques and tools to find the one that works best for you, and always keep in mind privacy and security considerations when capturing and sharing screenshots.


