Method of Clearing Facebook Cache on iPhone: A Comprehensive Guide
Free Up Space, Improve Performance, and Enhance User Experience with a Few Simple Steps

In the digital era, our smartphones are our lifelines. They store a wealth of information, memories, and data that help us navigate our lives. But like any device, they can become bogged down with unnecessary data, slowing down performance and eating up precious storage space. One of the primary culprits? App caches, particularly from frequently used platforms like Facebook. This article aims to guide you on how to clear Facebook cache on your iPhone efficiently.
Table of Contents
Understanding Cache: What is it and why should you clear it?
The cache is essentially a storage area where frequently accessed data can be stored for rapid access. When you use Facebook on your iPhone, the app stores temporary files or “cache” to help the app load faster next time. But over time, this cache can grow significantly and start to clog up your iPhone’s storage. Clearing your Facebook cache not only frees up space but can also help to resolve issues with the app’s performance.
Steps to Clear Facebook Cache on iPhone
Let’s dive into the process of clearing the Facebook cache on your iPhone. Please note that this guide is based on the latest version of the Facebook app and iOS as of May 2023.
Step 1: Open the Facebook App
Start by launching the Facebook app on your iPhone. Ensure that you are logged in to your account.
Step 2: Access the Settings Menu
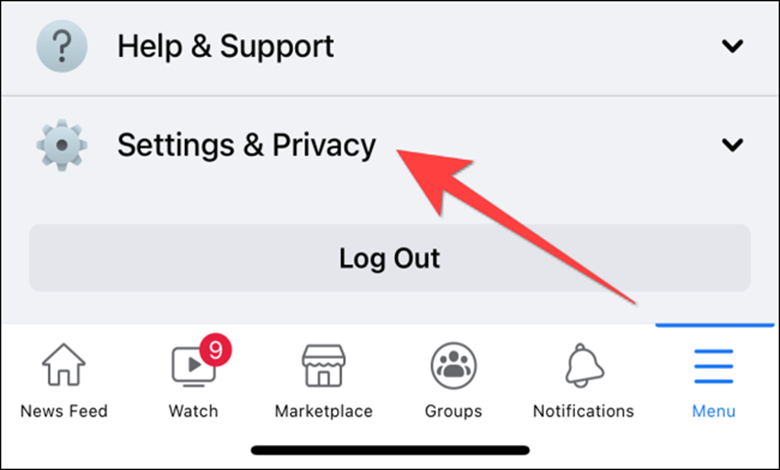
Once inside the app, tap on the menu icon (three horizontal lines) located at the bottom right of the screen. Scroll down to find and select the “Settings & Privacy” option, which will expand to reveal additional options. Tap on “Settings”.
Step 3: Clear Facebook Cache
In the settings page, scroll down until you find the “Media and Contacts” section. Here, you will find the “Browser” option. Tap on it. Within this section, tap on “Clear Browsing Data” and confirm the action.
And voilà! You have successfully cleared your Facebook cache on your iPhone.
What to Expect After Clearing the Cache?
Clearing the cache might seem like a small step, but it can bring about significant changes. You might notice that the Facebook app takes slightly longer to load content immediately after clearing the cache, but don’t worry – this is normal. The app is merely recreating the cache. Over time, you should notice smoother performance and less storage used by the app.
FAQs on Clearing Facebook Cache on iPhone
Q1: How often should I clear my Facebook cache?
While there’s no hard and fast rule, a good practice is to clear your cache every few months or when you notice a slowdown in app performance.
Q2: Will clearing my Facebook cache delete my personal data?
No. Clearing cache does not delete any personal data, like your messages or photos. It only removes temporary files stored by the app.
Q3: Can clearing the cache help with Facebook app errors?
Yes, it can. If you’re experiencing glitches or bugs with the Facebook app, clearing the cache is a good first troubleshooting step.
Conclusion
Learning how to clear Facebook cache on your iPhone is a handy skill to add to your tech-savvy repertoire. It not only helps free up storage space but also improves app performance, delivering a smoother, more enjoyable user experience. Remember, our digital devices need maintenance and care just like any other tool. Regular cache clearing is a simple, yet effective way to keep your iPhone running optimally, ensuring that you can enjoy browsing on Facebook without any hiccups.


