Capturing Moments: Taking Screenshots on the OnePlus Nord CE3
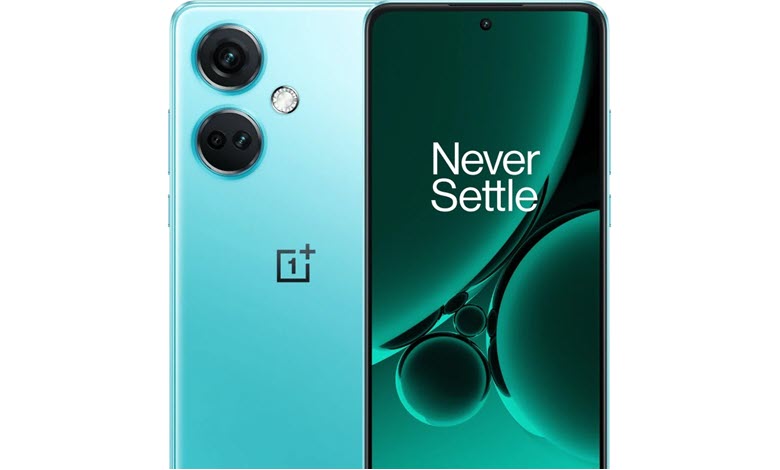
In our increasingly digital age, screenshots have emerged as a crucial tool for instant information sharing. Whether it’s a mind-boggling snippet from a web article, a snapshot of an intriguing social media post, a crucial segment of a work presentation, or a fleeting moment from a live video – the uses of screenshots are as varied as they are many. Especially when you’re using an advanced device like the OnePlus Nord CE3, the possibilities are truly endless. This powerful device not only offers remarkable performance, stunning visuals, and a user-friendly interface, but also equips users with versatile ways to take screenshots. Whether you’re a tech enthusiast seeking to make the most out of your OnePlus Nord CE3 or someone who’s just started exploring the device’s features, understanding how to efficiently take screenshots is vital. In this comprehensive guide, we will be delving into the different techniques available for capturing screenshots on your OnePlus Nord CE3. Each method brings its own unique flair, allowing you to select the one that best aligns with your personal preferences and requirements.
Table of Contents
Methods / Techniques for Capturing Screenshots on OnePlus Nord CE3
In this section, we’ll take a look at the different ways to take screenshots on your OnePlus Nord CE3. Each method is special in its own way, letting you choose the one that fits best with your needs and comfort.
Method 1. Traditional Button-based Screenshot:

- Start by opening the screen that you wish to capture. This could be a message, a website, an app interface – anything displayed on your screen.
- Once you’re on the desired screen, press and hold the Power and Volume Down buttons at the same time. Be sure to press them simultaneously, as pressing one before the other may trigger different functions.
- Your screen will briefly flash, indicating that the screenshot has been taken. Your screenshot will be instantly saved to your phone’s Gallery in a dedicated Screenshots folder.
Method 2. Three-finger Screenshot Gesture:

- First, you need to enable this feature. Go to Settings on your OnePlus Nord CE3. In Settings, find and tap on Buttons & gestures. Within this menu, select Quick Gestures.
- Inside Quick Gestures, you’ll find the ‘Three-finger screenshot’ option. Enable this feature by toggling the switch to the ‘on’ position.
- Now, anytime you wish to take a screenshot, you simply need to place three fingers together on the screen you want to capture and slide them down. This will instantly take a screenshot and save it to your phone.
Method 3. Expanded Screenshot for Scrolling Pages:
- This feature is especially handy when you want to capture content that spans more than a single screen length, such as a long article or a chat conversation.
- To take an expanded screenshot, first navigate to the page you want to capture and initiate a screenshot using either the traditional button-based method or the three-finger gesture method.
- After the screenshot is captured, a menu will pop up at the bottom of the screen. In this menu, select the ‘expanded screenshot’ option.
- Your OnePlus Nord CE3 will automatically scroll down the page, capturing all the content in a long, continuous image. It will stop at the end of the content or when you tap the screen to halt the process.
Method 4. Adding Screenshot Option to Power Menu:
- If you frequently take screenshots, this option could be a convenience. Go to the Settings on your OnePlus Nord CE3. Find and select ‘Buttons’ within the settings.
- Inside the Buttons menu, select ‘Edit Power Menu’. Here, you can choose to add a Screenshot option to your power menu.
- Once added, you can take a screenshot by holding down the Power Button to bring up the power menu, and then select the ‘Screenshot’ option. This will capture a screenshot of the current screen.
Method 5. Power Button Menu Screenshot:
- This method uses a feature found in many Android phones. To use it, press and hold down the power button for a few seconds.
- A menu will appear on the screen with options like ‘Power off’, ‘Restart’, and ‘Screenshot’.
- Tap on the ‘Screenshot’ button, and the phone will capture an image of your current screen. This is an excellent way to take a quick screenshot without the need for any key combinations.
Method 6: Using Google Assistant for Screenshots:
- OnePlus Nord CE3, being an Android device, has Google Assistant built-in, which can be used for taking screenshots as well.
- Activate Google Assistant by saying “OK Google” or “Hey Google”. If these commands are not enabled, you can also press and hold the home button to launch Google Assistant.
- Once Google Assistant is activated, say “Take a screenshot”.
- Google Assistant will take a screenshot of the screen that was present before Assistant was activated.
- Note that screenshots taken with Google Assistant will not be automatically saved. Instead, after the screenshot is taken, a sharing menu will appear providing options to share or save the screenshot.
Locating your Screenshots:
- After taking a screenshot, you might be wondering where the image gets stored.
- On OnePlus Nord CE3, screenshots are saved in a dedicated folder in the phone’s built-in storage.
- To access your screenshots, open the ‘Files’ app on your phone. Tap on the hamburger menu button (three horizontal lines) on the top left of the screen. This will bring up a selection of file types found on the device.
- Look for a category called ‘Images’. Under this category, you’ll find a folder named ‘Screenshots’. This is where all your screenshots are saved, and you can browse through them anytime you want[1].
Wrap Up:
Taking screenshots on your OnePlus Nord CE3 can be done in various ways, each with its own unique benefits. The traditional button-based method, the three-finger gesture, expanded screenshots for long content, adding a screenshot option to the power menu, and using the power button menu or Google Assistant, offer you an array of options to capture your screen. Pick the one that works best for you, and remember, all your screenshots are safely stored in the ‘Screenshots’ folder within the ‘Images’ category of your Files app.
FAQs
1. What is the quickest way or a gesture to take a screenshot on the OnePlus Nord CE3?
The quickest way is using the three-finger gesture, once you have it enabled. Just swipe three fingers down on your screen, and you’ve got a screenshot.
2. Can I take a screenshot of a whole web page at once on my OnePlus Nord CE3?
Yes, you can use the expanded screenshot feature for that. It allows you to capture long, scrolling pages in one screenshot.
3. Can I use Google Assistant to take screenshots on OnePlus Nord CE3?
Yes, you can activate Google Assistant and simply say “Take a screenshot”, and it will do the job for you.
4. Where are my screenshots saved on OnePlus Nord CE3?
Screenshots are saved in a dedicated ‘Screenshots’ folder which is located in the ‘Images’ category of your Files app.
5. Can I add a screenshot option to the power menu?
Yes, you can add a screenshot option to your power menu in the ‘Edit Power Menu’ section found in ‘Buttons’ within your settings.
6. How can I take a scrolling screenshot on my OnePlus Nord CE3?
Yes, you can capture an expanded screenshot by using either the button-based screenshot method or the three-finger gesture, then selecting the ‘expanded screenshot’ option that appears
Conclusion
In our digital age, knowing how to effectively capture, manage, and retrieve screenshots on your device is essential. With the OnePlus Nord CE3, you have numerous methods at your disposal to do just that. By understanding and leveraging these features, you can not only enhance your efficiency but also elevate your user experience. Whether it’s capturing a funny conversation, saving important information, or even troubleshooting technical issues, mastering screenshots on OnePlus Nord CE3 is a valuable digital skill. With these steps, anyone can master taking screenshots on the OnePlus Nord CE3, making it easier to share information, capture memories, or document important data. Happy screenshotting!


